the site
NewsAbout Stefan
3D section
PoserPixels:3D
Cinema4D
Misc
Music ProjectsSoftware
iBook
Required: Poser 4, Photoshop 5 or similar image manipulation program
Recommended: Pro Pack
Depth of field is the natural effect that not all objects appear precisely sharp. Objects before or behind a focuts point are blurred. Usually, one does not find this effect in computer generated images: All objects are rendered perfeclty sharp, which gives the images an unnatural artificial appearance. Poser 5 with the FireFly renderer introduced a 3D depth of field effect, which takes a while to render. I will now demonstrate a method to achieve a 2D depth of field effect that can be done much quicker with the aid of an image editor. This is achieved by using a depth map to mask out certain regions of the image and then applying a blur filter.
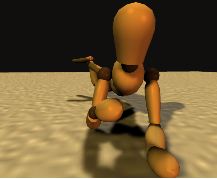
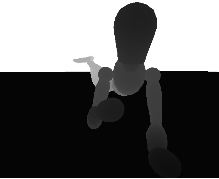
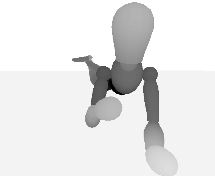
First, start by rendering your image as you would usually. Next you turn on depth cueing, delete all lights, set all materials to black and the background color to white. I wrote a Python script that will take care of the materials and lights, you can use that if you run ProPack or Poser 5. You will notice how you now get a depth map image, with objects being close to the camera being black and objects far from the camera being white. Save that image. (You might want to try if rendering the image improves the quality over the preview rendered image. Depending on your scenery, things might get worse instead. In any case, do not antialias the depth map image. In Poser 5, switch to the Poser 4 renderer for the depth map.)
You should now have two images like these:
Switch to the image editor (in my case, Photoshop). Open the depth map image and determine the gray shade objects in your focus point have. Then use image/adjust/curves... to create a „valley“ curve like this, with the lowest point at the gray shade determined before:
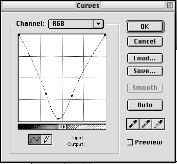
This should now color objects close to the focus point in black and objects away from it in white.
Select the whole image and copy it to the clipboard. Now open the rendered image and switch to Quick Mask mode.

Paste the image from the clipboard. Swith back to regular mode and apply a blur filter.

Have fun,
Stefan